Windows 10 IoT Terminal Deployment – Part 6 – Manage the system local on first boot
March 7, 2020, 11:03 pmHi everyone
Today I will share a small tip if you got a lot of Windows 10 to manage the default language. IoT or any other Windows 10 version for that tip.
A lot of new system come by default in en-US but if you want to automate the distribution you can tweak a bit some policy to set correctly the wanted locale.
It seem simple, but don't forget the locale impacts those settings differently;
- The OS language
- The login screen language
- The default keyboard for new session
- The default keyboard for the login screen
- The date format and various localized settings
For almost all of those settings it's a settings to push for each one.
Where it can be tricky is if like me you live in zone where the default keyboard never match by default.
In example, I live in French's Canada, and Windows put for me Canadian multilingual by default, which is not the best one for fr-CA. You have legacy french Canadian keyboard and finally the french Canadian's layout.
So when we push the locations settings, as you can guess in a case like me the default keyboard is never set correctly, thus it need a bit more settings to push.
First of, you need to know if your computer got ready the language pack or not. On IoT usually they are already ready. If not, please download the language ISO and copy the one you need to deploy.


When the file is deployed, you can pre-install the .cab that way in a script :
dism /online /add-package /packagepath:C:\Microsoft-Windows-Client-Language-Pack_x64_fr-ca.cab
After that we can run the script to set the correct layout we need, I will explain below;
Powershell.exe -executionpolicy remotesigned -File C:\language.ps1
control.exe intl.cpl,, /f:"C:\language.xml"
language.ps1
Set-Culture fr-CA
Set-WinSystemLocale fr-CA
Set-WinHomeLocation -GeoId 39
Set-WinSystemLocale -SystemLocale fr-CA\$langList = New-WinUserLanguageList -Language "fr-CA"
\$langList[0].InputMethodTips.Clear()
\$langList[0].InputMethodTips.Add('0c0c:00001009')
\$langList.Add("en-US")Set-WinUserLanguageList -LanguageList \$langList
language.xml
\<!--Keyboard Language Change-->
\<gs:GlobalizationServices xmlns:gs="urn:longhornGlobalizationUnattend">
\<!--User List-->
\<gs:UserList>
\<gs:User UserID="Current" CopySettingsToDefaultUserAcct="true" CopySettingsToSystemAcct="true"/>
\</gs:UserList>\<!-- MUI-->
\<gs:MUILanguagePreferences>
\<gs:MUILanguage Value="fr-CA" />
\<gs:MUIFallback Value="fr-CA" />
\</gs:MUILanguagePreferences>\<!--input preferences-->
\<gs:InputPreferences>
\<!--en-US-->
\<gs:InputLanguageID Action="add" ID="0409:00000409"/>
\</gs:InputPreferences>
\</gs:GlobalizationServices>
The command Powershell.exe -executionpolicy remotesigned -File C:\language.ps1 does set the location and the default local.
The only thing the script can't do, is to set the keyboard for NEW users account.
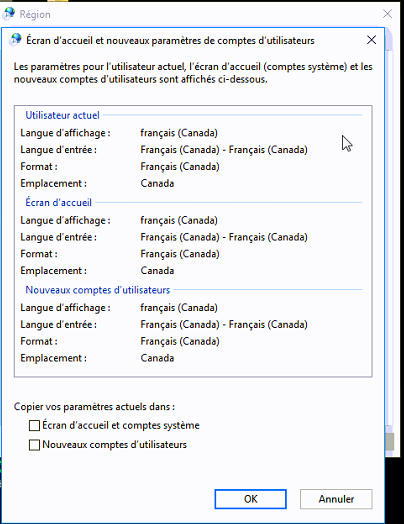
The XML import, control.exe intl.cpl,, /f:"C:\language.xml", simulate a click on apply to new user account and to the login screen and system's account. The important flag is see is; CopySettingsToDefaultUserAcct & CopySettingsToSystemAcct
That XML set that screen options correctly;
Thanks everyone :)
Windows 10 IoT Terminal Deployment – Part 5 – HPDM - Auto-Enrollment into the Domain
February 24, 2020, 6:22 pmHi everyone
Today I will talk about the auto-enrollment inside the domain.
This task is possibly one of the first that would be done if you have a internal domain.
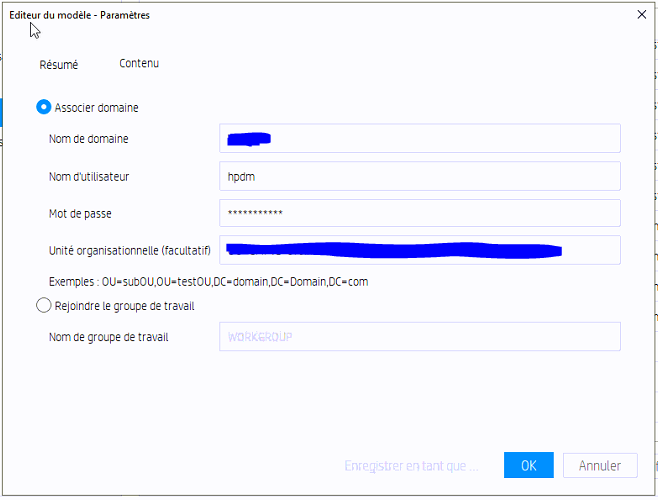
For this task I suggest to create a service account that will have the correct deleguated right. In my case, with my exytaordinary imagination, created an account named hpdm 😳🤷♂️
The task itselft is kinda straighforward to create from the HPDM, but if we want to autoenroll our devices, so if like our customers plug 100 or even 1000 of devices we want to do the less manual tasks possibles and with the autoenrollment we can target GPO to those computers afterward.
For rhe task please create too an OU where all those IoT device will be :) a big party for them alone.. just kidding.
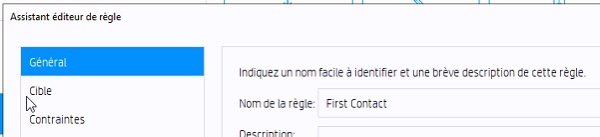
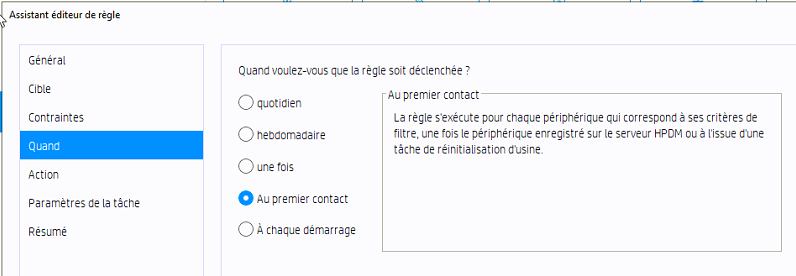
In the HPDM we will start by creating a rule with a first contact condition.
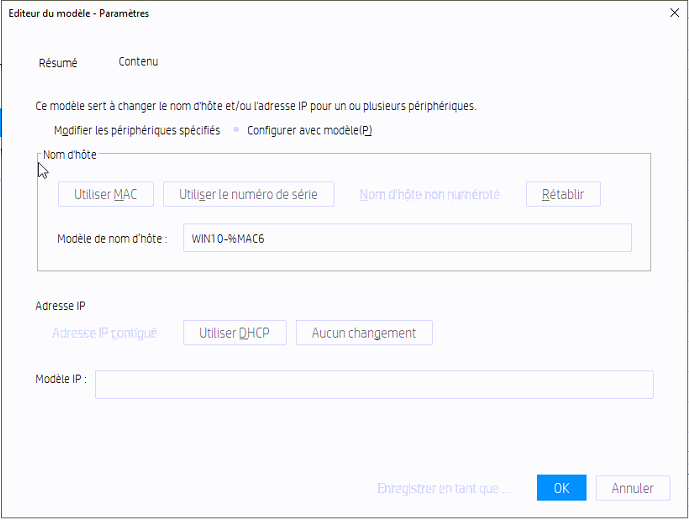
In my rule I will add another configuration too, I will rename the terminal. As the generic name is pretty ugly, I will add one easier to spot. Out of the box it's a generic name generated from the MAC address, in my task I will rename the terminal to win10-mac.
Now for the rule;

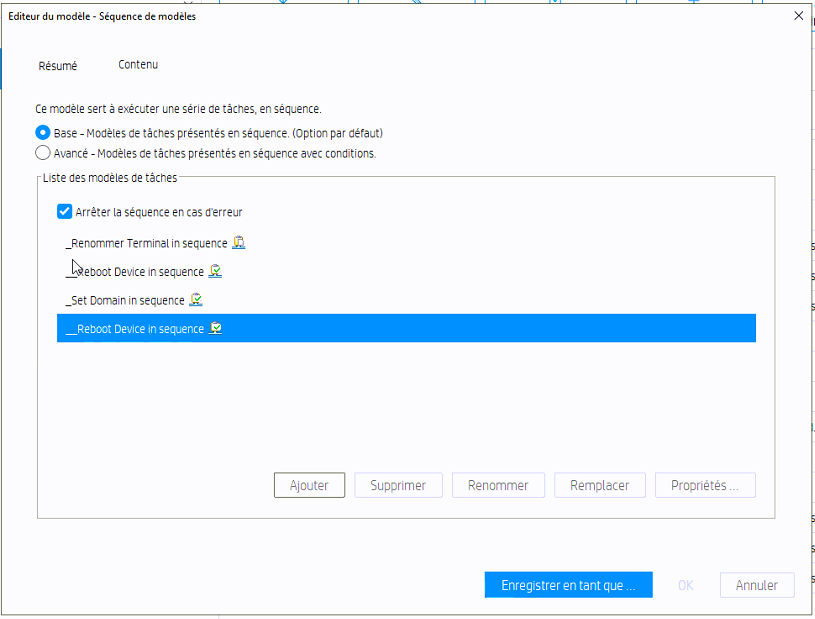
The sub task :
Our domain creatial and the target OU:
The renaming task:
After we can apply that rule :)

I hope you enjoyed today tip !
Windows 10 - Cant deploy printers - Spooler error 0x000006BA / 0x000003EB
February 4, 2020, 11:22 pmHi everyone
Today I wanted to talk a small bug I seen from some Windows 10 with UWF enabled.
The error I seen was 0x000003EB and 0x000006BA
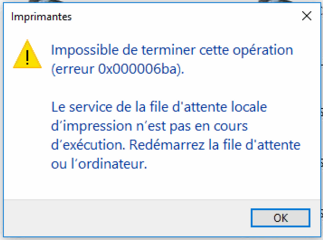
The error is pretty generic, but the system greyed all the printers in the Windows 10's list, and you can't connect to other printers from the server, nor add them by GPP or by deploying them.
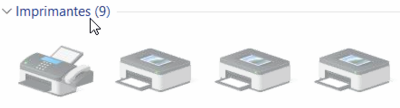
In the past I used to use a Microsoft KB .exe to fix and erase all the spooler, by a hard reset, but the utility was removed from the website, as such to find the exact cause or to reset the error I suggest to get that small Kyocera's utility (KM Deleter) now;

The error in my case seemed to come from UWF, as I unlocked the spooler folder for read and write, but I miss some registry key. As seen there;
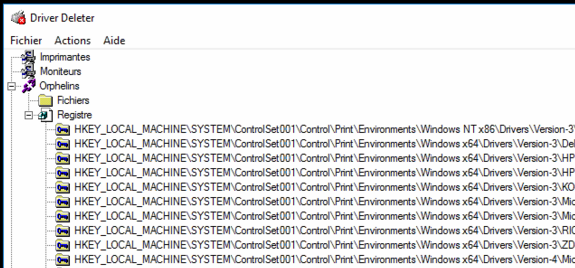
As you can see no file or driver were present, but the registry were, so it blocked the Windows 10 to reconnect to those printers.
In my case I allowed more exceptions in the UWF, but you can see those two errors can happen if the driver is badly setupped, or missing necessary files.
Windows 10 IoT Terminal Deployment – Part 4 – Apps Publishing (HPDM - HP Device Manager)
January 30, 2020, 10:11 pmHi everyone
In the previous article series about deploying Windows 10 IoT terminal I talked about the global use in the Introduction, and secondly how to protect the C drive for unwanted change.
Now in this article I will bring subject, how to publish application to those terminals and I will start by talking HPDM.
It exist some way that we need to think about;
- Application pushed by a remote server and using the remote server ressources; Remote App, XenApp (technically speaking you need the RDSCAL to run XenApp, as such I tell about it there, but overall you must see XenApp as a feature set over RemoteApp)
- Applications pushed by a remote server, but running on the terminal; App-V, MSIX, XenApp Streaming Client (depreciated)
- Applications pushed by GPO (.MSI)
- Application pushed by HP Device Manager (HPDM)
Now the fact that we protect the hard disk bring us some limitations, as such in my guide I suggest for Office, or such application to be pushed by RemoteApp (or XenApp). The limitation is not only the fact the hard disk is using a UWF, but by the fact on IoT terminal the SSD is often small, and we try to not overuse it by product update. With a central server you can update the program and each terminal would be using the latest version of the productivity's suite.
I would start by talking of the HP Device Manager. On other articles I will cover other's way.
We need to install it first and I suggest the latest version 5. We now need to have an account, and you need to ask to download, after we can got it free.
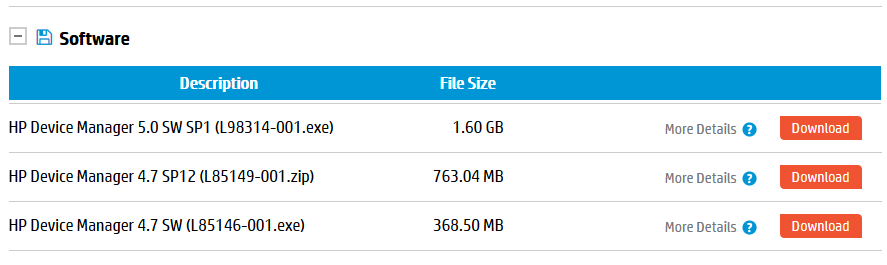
I will skip the install step as I want to focus on how to push the application correctly with the tool.
For the test I will push Google Chrome Enterprise.
At first we go inside the template menu in HPDM, and we want to push the file to the terminals;
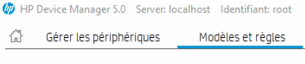
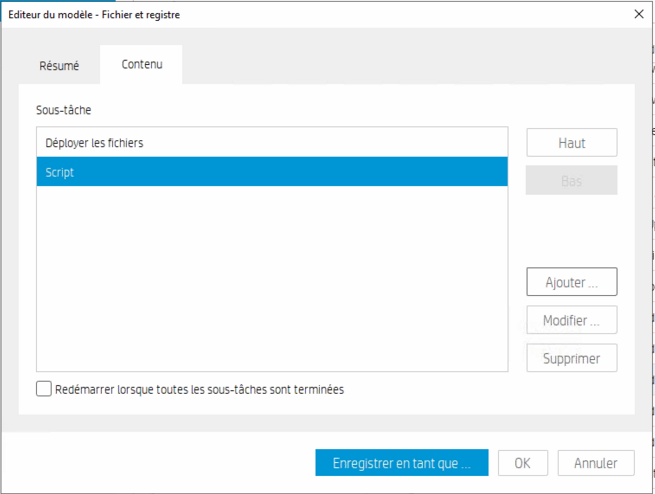
We select the _File and Registry Template
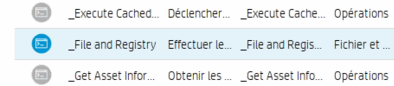
Inside the template we click Add (Ajouter)
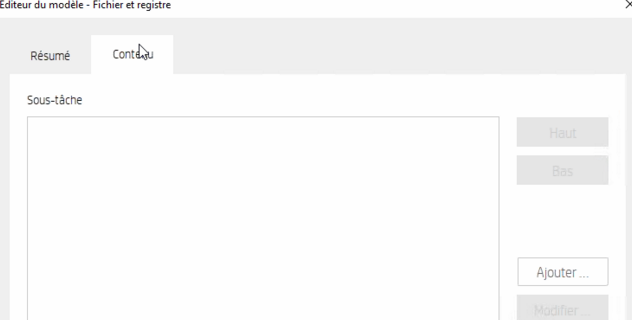
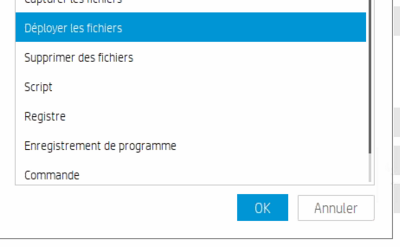
We click Deploy Files (Deployer les fichiers)
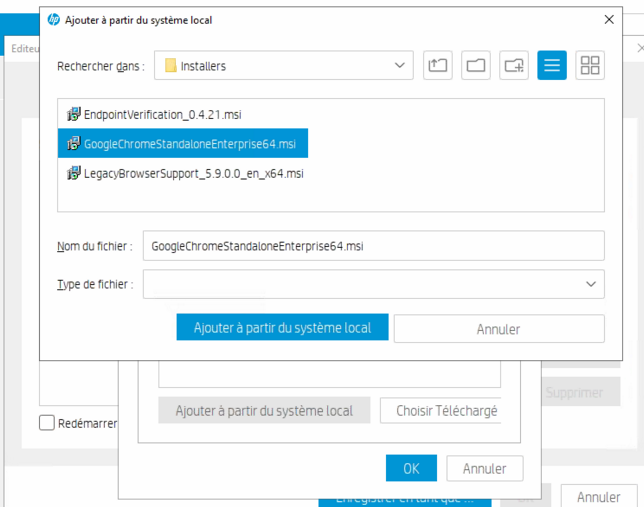
We click to add the Chrome Enterprise .msi
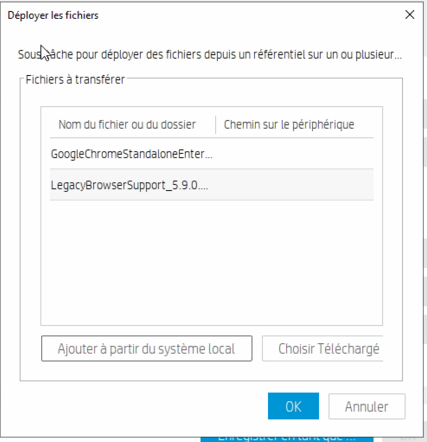
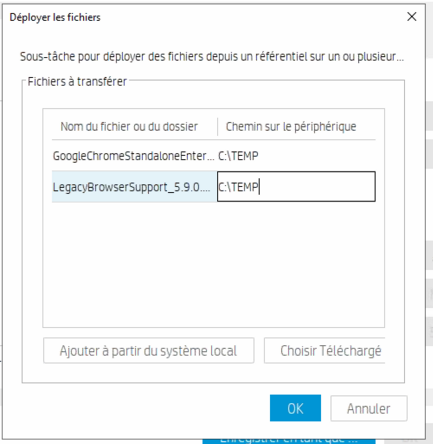
For the folder we select C:\TEMP, which is a special folder for the terminal.
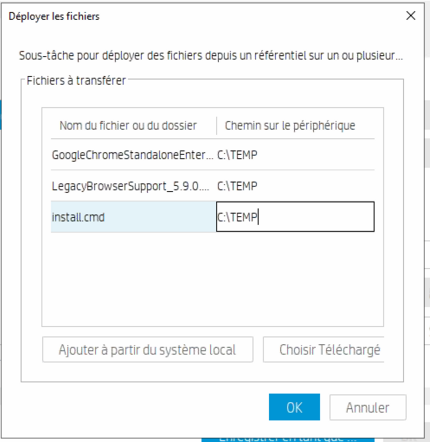
We create an install.cmd (with that content), and we will push that file too;

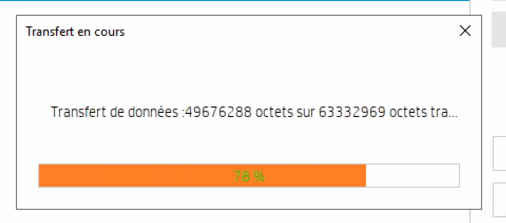
Now we click Ok, HPDM will upload the file to its HTTP repertory and we click Generate.
After that we create a script action;
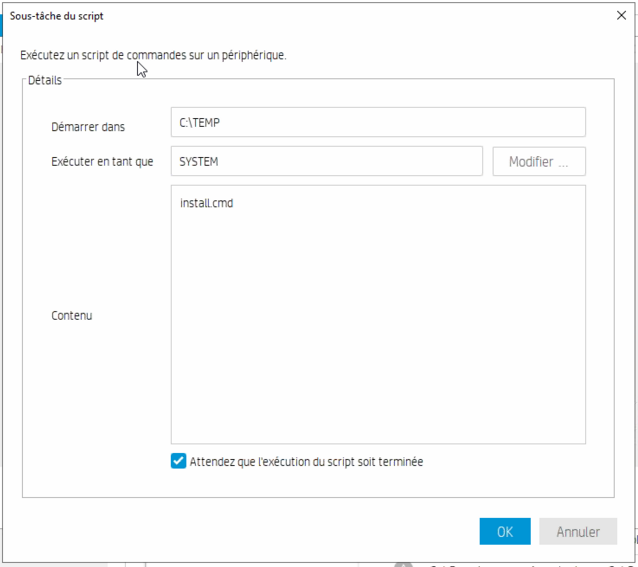
We save that, and now we do another template, a Sequence Template.

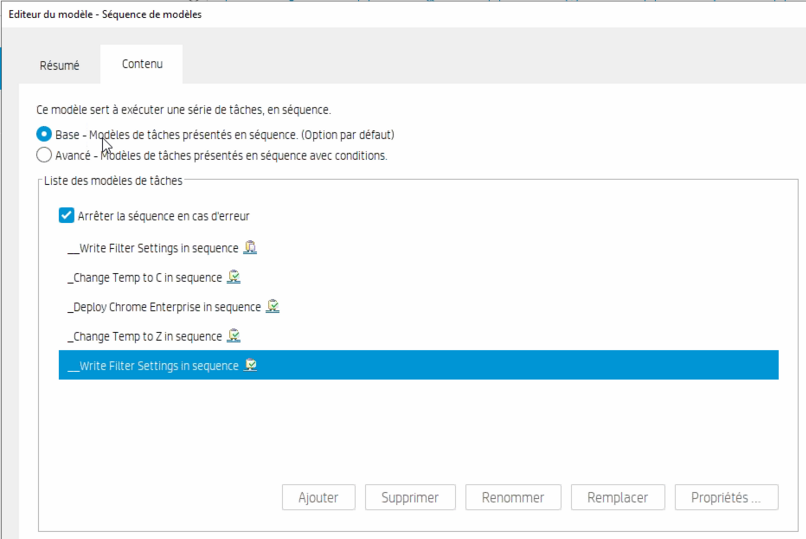
Inside the sequence, we need that;
- We turn OFF HPWF or UWF.
- Change Temp to C.
- We deploy our first sequence's files.
- We change back Temp to Z.
- We turn ON HPWF or UWF.
The task should look that way:
And voila, we can now deploy to any number of terminals we want the needed local application they need ! That finish that article.
Take care, and see you soon in the next article for that serie :)
Windows 10 IoT Terminal Deployment - Part 2 - Protect the Hard Disk ? - Deploy Write Filter !
January 24, 2020, 11:22 pmHi everyone !
In the second part of my article on how to deploy some thin client that run Windows 10 IoT I will talk on the write filter.
It exist three way to manage it that I know that exist;
1 - HP Write Filter (Shipping inside that terminal model as it's a HP's brand)
2 - Microsoft Unified Write Filter. That is new a new feature that come from EWF. (Shipped inside the terminal, as the Windows IoT is an Enterprise's build)
3 - DeepFreeze (not free)
Today I will talk about HPWF and how to deploy the settings to the terminals.
To make the initial configuration to deploy, you must login inside one terminal to configure the overlay exception. We will capture the change after to deploy that.
We right click the HPWF management icon in the systray; it's the green lock.
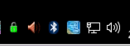
A side note; The green icon mean the overlay usage is ok, if it turn yellow or red, it mean it's now in a critical state. To explain it, the overlay is stored inside the RAM, and each file change is stored inside of that buffer, it's how the system can revert back the change after a reboot.
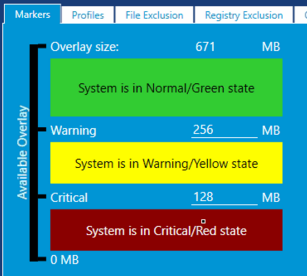
Let's go back to our settings, when we will click the icon we will see which write filter is used;
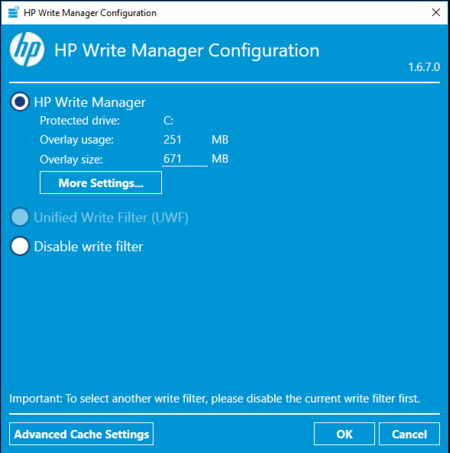
Inside that windows we can click the More Settings to see which exception is set, and what use the overlay;
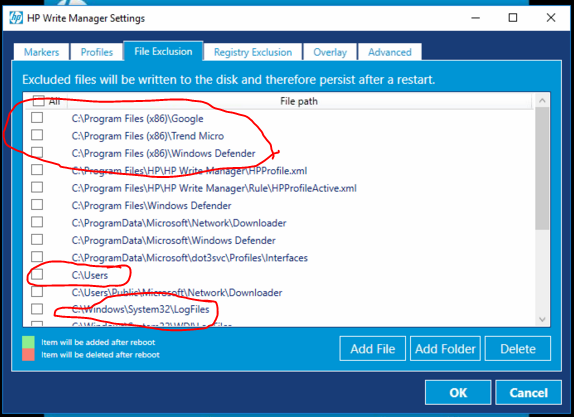
I put in red some exception that I did, as some default's exception exist. The exception I really suggest to enable is for;
- Your Antivirus product.
- In that case I added TrendMicro and Windows Defender
- The user profile if you intend to not use roaming profile, and that you want permanent settings for the user.
- Chrome there, as the default behaviour of Chrome is to auto-update (which is not bad if you want to be secure in the long term)
- I suggest too the Windows LogFiles folder.
The exception will allows our Antivirus to update in a day to day routine, while most of the program files and system folder will revert back.
I suggest to target a test user and test the terminal to see if the overlay cache stay in a consistent state. The goal is if the user write a lot of data to the hard-drive for a reason X, we need to know why.
With the why, we can try to push an needed application to a RDS server in example to prevent HDD usage, or if really needed we can make new exception.
Now to push the settings we need HPDM, which I talk more in detail in the part 3, but I will show you the task to do;
We need to capture the settings, and after we push the captured settings back to our terminals.
The two task w e need to know is:
_Capture Write Filter Exclusion List
This template captures the FBWF/UWF exclusion list from a device running a Windows operating system with FBWF or UWF.
_Deploy Write Filter Exclusion List
This template deploys the write filter exclusion list to devices running a Windows operating system with FBWF or UWF
Thanks everyone for reading, stay tuned for the part 3 soon !
Windows 10 IoT Terminal Deployment – Part 1 – Introduction