Windows 10 IoT Terminal Deployment - Part 2 - Protect the Hard Disk ? - Deploy Write Filter !
January 24, 2020, 11:22 pmHi everyone !
In the second part of my article on how to deploy some thin client that run Windows 10 IoT I will talk on the write filter.
It exist three way to manage it that I know that exist;
1 - HP Write Filter (Shipping inside that terminal model as it's a HP's brand)
2 - Microsoft Unified Write Filter. That is new a new feature that come from EWF. (Shipped inside the terminal, as the Windows IoT is an Enterprise's build)
3 - DeepFreeze (not free)
Today I will talk about HPWF and how to deploy the settings to the terminals.
To make the initial configuration to deploy, you must login inside one terminal to configure the overlay exception. We will capture the change after to deploy that.
We right click the HPWF management icon in the systray; it's the green lock.
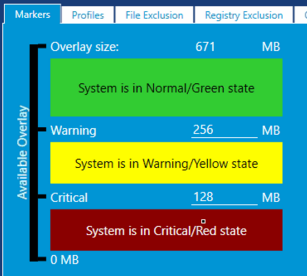
A side note; The green icon mean the overlay usage is ok, if it turn yellow or red, it mean it's now in a critical state. To explain it, the overlay is stored inside the RAM, and each file change is stored inside of that buffer, it's how the system can revert back the change after a reboot.
Let's go back to our settings, when we will click the icon we will see which write filter is used;
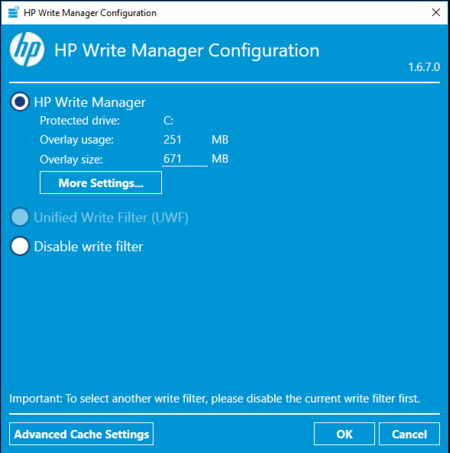
Inside that windows we can click the More Settings to see which exception is set, and what use the overlay;
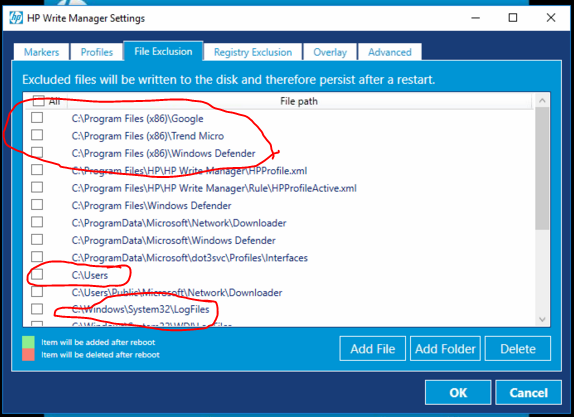
I put in red some exception that I did, as some default's exception exist. The exception I really suggest to enable is for;
- Your Antivirus product.
- In that case I added TrendMicro and Windows Defender
- The user profile if you intend to not use roaming profile, and that you want permanent settings for the user.
- Chrome there, as the default behaviour of Chrome is to auto-update (which is not bad if you want to be secure in the long term)
- I suggest too the Windows LogFiles folder.
The exception will allows our Antivirus to update in a day to day routine, while most of the program files and system folder will revert back.
I suggest to target a test user and test the terminal to see if the overlay cache stay in a consistent state. The goal is if the user write a lot of data to the hard-drive for a reason X, we need to know why.
With the why, we can try to push an needed application to a RDS server in example to prevent HDD usage, or if really needed we can make new exception.
Now to push the settings we need HPDM, which I talk more in detail in the part 3, but I will show you the task to do;
We need to capture the settings, and after we push the captured settings back to our terminals.
The two task w e need to know is:
_Capture Write Filter Exclusion List
This template captures the FBWF/UWF exclusion list from a device running a Windows operating system with FBWF or UWF.
_Deploy Write Filter Exclusion List
This template deploys the write filter exclusion list to devices running a Windows operating system with FBWF or UWF
Thanks everyone for reading, stay tuned for the part 3 soon !
Windows 10 IoT Terminal Deployment – Part 1 – Introduction
Office 2019 / 365 Deployment
January 23, 2020, 11:42 pmHi everyone
Today I wanted to share some tips to deploy Microsoft Office 2019 to multiple computers.
The new way to deploy it differ from the older version as you now need to modify an XML file with the setup.exe
In the past we could do a customized setup by running the setup wizard, setup.exe /admin, which was creating a custom file for the setup. Now it's all XML's based.
First, you might need that setup if you use internally a KMS's server:
Microsoft Office 2019 Volume License Pack
This download is needed for administrators to set up activation for volume license editions of Office 2019, Project 2019, or Visio 2019 by using either the Key Management Service (KMS) or Active Directory.
After that download we will go find the deployment tool:
The Office Deployment Tool (ODT) is a command-line tool that you can use to download and deploy Office 365 ProPlus to your client computers. The ODT gives you more control over an Office installation: you can define which products and languages are installed, how those products should be updated, and whether or not to display the install experience to your users.
We now have everything we need, from there after we need to edit the XML file to add the option we need.
An example XML;
\<Configuration>
\<Add SourcePath="\\Server\Share"
OfficeClientEdition="32"
Channel="Broad" >
\<Product ID="O365ProPlusRetail">
\<Language ID="en-us" />
\<Language ID="ja-jp" />
\</Product>
\<Product ID="VisioProRetail">
\<Language ID="en-us" />
\<Language ID="ja-jp" />
\</Product>
\</Add>
\<Updates Enabled="TRUE"
UpdatePath="\\Server\Share" />
\<Display Level="None" AcceptEULA="TRUE" />
\<Logging Level="Standard" Path="%temp%" />
\</Configuration>
We can see all XML options there, Configuration options for the Office Deployment Tool. As stated inside that article, and I confirm it too, it's way easier now to use online tool on config.office.com (https://config.office.com/deploymentsettings)
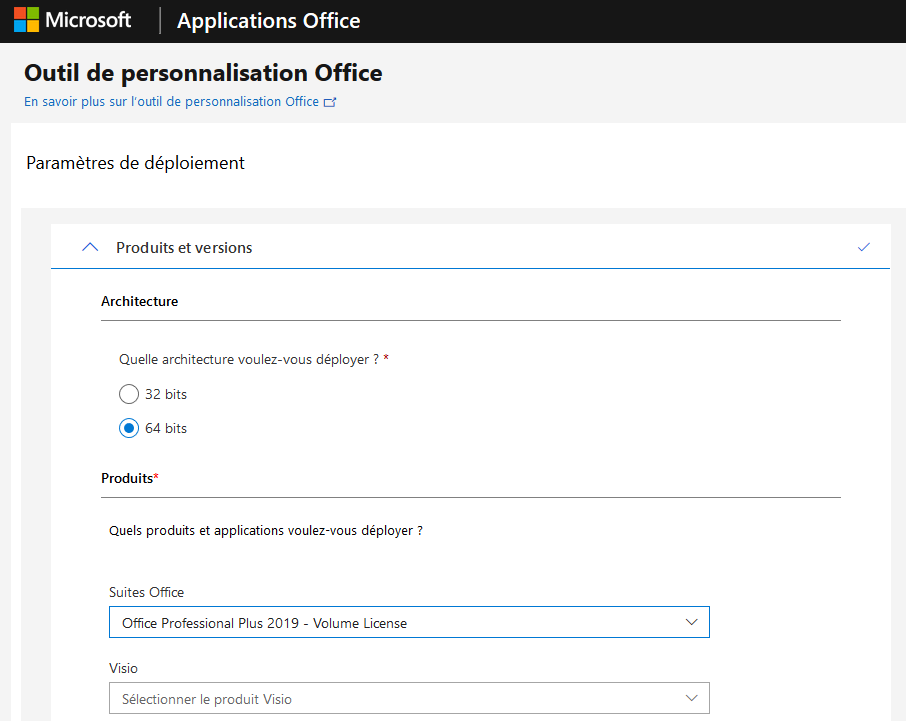
Now with a XML ready, we are now ready to issue a first command with the deployment tool;
setup.exe /download configuration.xml
The command will download the specific files needed to do the deployment. I suggest to copy those files to a central store to deploy to multiple machines.
Now we run that command to actually install the product;
setup.exe /configure configuration.xml

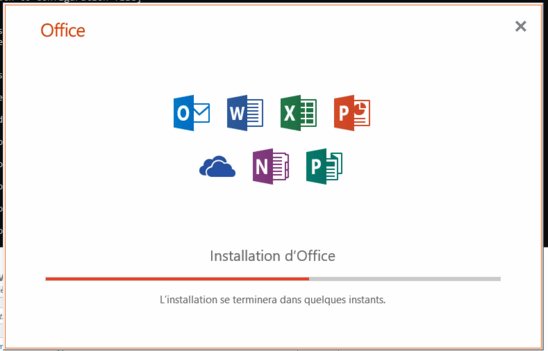
Now we are ready to use Office ! :D
Windows 10 IoT Terminal Deployment - Part 1 - Introduction
January 22, 2020, 10:08 pmHi everyone
Today I will cover a topic that will fall into multiple subject and that not many blogger talk about; How to plan and deploy a lot of Windows 10 IoT terminals
In my test I used the new HP ThinClient (t430) that is bundle that way;
The look is that way; as you can see it's really small and built to be flexible where to install, like able to fix them to the back of the monitor if needed.
It's a handy device for place like a public library
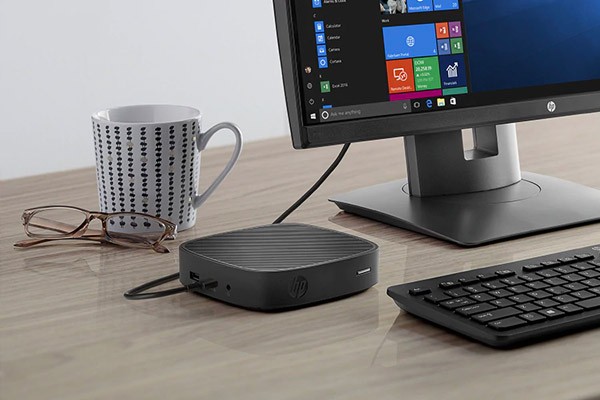
These thin client advantage is that they come shipped with some management software and come with the full Windows 10 feature set. The Windows IoT for that model is an Windows 10 Enterprise LTSB build 1609.
Pre deployment, you have some questions to ask yourself;
- To protect the system drive; do you plan to use HP Write Filter (HPWF) or Microsoft Unified Write Manager (UWF) out of the box ? or to use another product (like DeepFreeze)
- Where the user profile would be stored ? Roaming profile, Mandatory profile, Redirected folder, etc...
- As by default the system drive is locked (HPWF or UWF), do you plan to write exception for the user profile if it's not a roaming profile ?
- How you will plan to deploy software, HP Device Manager, or with GPO ?
- As the device ram can be limited, and the system drive locked, do you plan to deploy a RDS server to deploy additional applications to the users ?
Some limitation you need to know before the deployment;
- The HPWF or UWF by default use a part of the RAM to store the files activities, which can limit what you use on the terminal.
- If you use a locked drive, you need to think for antivirus update, where you store them, so the machine could store the data (Write filter exception or thawed space)
- Windows Update need to be planned as by default the terminal does not update itself. So you must do sequential task usually to allow the Windows update install to stay inside the machine.
As you can see, to deploy such solution bring some questions, but in the end to think it before a deployment is the best course of actions, as it will lead to good user feedback in the end.
Thanks, and stay tuned for other articles coming soon !
I will talk next on how to deploy the machine + autojoin to the domain (part 3), how to manage and control the write filters with example (part 2) :)
Windows 10 IoT Terminal Deployment – Part 2 – Protect the Hard Disk ? – Deploy Write Filter !
Microsoft Team support for CentOS 7 / RedHat
January 16, 2020, 4:18 pmHi everyone
Today I just wanted to share a small tip.
If you want to support Microsoft Team inside CentOS 7 or RedHat you can now have a insider build, which could make it run.
teams-insiders-1.3.00.958-1.x86_64.rpm
Without it you could have error like that;
rpm -i teams-1.2.00.32451-1.x86_64.rpm
warning: teams-1.2.00.32451-1.x86_64.rpm: Header V4 RSA/SHA256 Signature, key ID be1229cf: NOKEY
error: Failed dependencies:
libstdc++.so.6(CXXABI_1.3.9)(64bit) is needed by teams-1.2.00.32451-1.x86_64
libstdc++.so.6(GLIBCXX_3.4.20)(64bit) is needed by teams-1.2.00.32451-1.x86_64
libstdc++.so.6(GLIBCXX_3.4.21)(64bit) is needed by teams-1.2.00.32451-1.x86_64
or that one too;
rpm -i teams-insiders-1.2.00.32955-1.x86_64.rpm
warning: teams-insiders-1.2.00.32955-1.x86_64.rpm: Header V4 RSA/SHA256 Signature, key ID be1229cf: NOKEY
error: Failed dependencies:
libstdc++.so.6(CXXABI_1.3.9)(64bit) is needed by teams-insiders-1.2.00.32955-1.x86_64
libstdc++.so.6(GLIBCXX_3.4.20)(64bit) is needed by teams-insiders-1.2.00.32955-1.x86_64
libstdc++.so.6(GLIBCXX_3.4.21)(64bit) is needed by teams-insiders-1.2.00.32955-1.x86_64
Thanks everyone
Prevent Office from saving to OneDrive by default
January 6, 2020, 9:23 pmHi
Today I wanted to share a small tip on how to prevent Office from saving to OneDrive by default ! A handy tip if you install Office on a Terminal Server or to your computers.
I share that tip as some users seen some information that the OneDrive save as location would be impossible to change.
IT pros, on the other hand, won't be able to alter this Office 365 default save behavior. A Microsoft spokesperson explained this point in a Monday e-mail in response to questions:
IT admins will not have control over the save dialog. That said, end users can change their default save location for Office programs. Office programs will save files in the default location, but the default working folder can be changed. To then save the copy in a different location, the end user can click a different folder in the folder list.
Following that information I tried to find where to find the setting to change that default location, and yes I found it !
HKEY_CURRENT_USER\Software\Policies\Microsoft\Office\16.0\Common\General PreferCloudSaveLocations : REG_DWORD : 00000000 :Hexadecimal
or there, but the user can change that one;
HKEY_CURRENT_USER\Software\Microsoft\Office\16.0\Common\General\PreferCloudSaveLocations
Now with that small tip you can now change that behavior :)